Size Does Matter (in JavaFX)
大小重要吗? 这个问题已经存在了一段时间,答案尚待辩论。 但这就是JavaFX,答案很明确:"是的,大小很重要。" 我并不是说用户界面需要变大以变得更好,而是要控制大小。 如果控制不当,最终将导致不良后果。 如果用户将窗口缩小得如此之小,以致于显示屏的一部分被切掉而再也看不到了,那当然了,除非将窗口再次放大。 也许它的大小调整得太大了,以至于接口边缘周围都有大量的空白空间。 因此,您将需要控制大小。 而且您很幸运,如本文所述,我将介绍一些实现此目的的方法。

我将重用我在以前的文章中编写的一些代码,因此看看JavaFX入门和JavaFX Charts看起来不错! 有关将在此处使用的一些代码的说明。
一个好的开始是控制窗口的最小和最大大小,尽管控制最大大小没有用,因为您可能希望用户能够全屏显示应用程序。 该窗口在JavaFX术语中称为舞台,因此要控制窗口的最小/最大尺寸,需要调整舞台上的某些属性。
1 2 3 4 5 6 7 8 9 10 11 12 13 14 15 16 17 18 19 20 21 22 23 24 25 26 27 | public class SizeAppLauncher extends Application { public static void main(String[] args) { Application.launch(SizeAppLauncher.class, args); } @Override public void start(Stage stage) throws Exception { try { final Parent root = FXMLLoader.load(getClass().getClassLoader() .getResource("lankydan/tutorials/fxml/SizeApp.fxml")); final Scene scene = new Scene(root); stage.setScene(scene); stage.setTitle("Size Example"); stage.setMinHeight(250); stage.setMinWidth(500); stage.setMaxHeight(500); stage.setMaxWidth(1000); stage.show(); } catch (Exception e) { System.out.print(e); } } } |
这里没有太多要解释的东西,您需要做的就是调用setMaxHeight,setMaxWidth,setMinHeight和setMinWidth方法,并传入您想要将Stage限制为的大小。 如果您决定不想限制最大大小,则只需删除set max方法,然后全部完成即可。 现在,删除最大大小不是什么大问题,但是不控制窗口的最小大小可能会使您的应用程序异常运行。 这不是明确的要求,因为用户通常不会使窗口变小,但是如果他们有可能这样做,那么不可避免地会有人这样做,因此警告您。
几行代码也可以保持窗口的长宽比,尽管在减小尺寸时它会出乎意料地起作用,这很烦人……因此,请捏一点盐,因为我个人不太喜欢使用它。
1 2 3 4 5 6 7 8 9 10 11 12 13 14 15 16 17 18 19 20 21 22 23 24 | public class SizeAppLauncher extends Application { public static void main(String[] args) { Application.launch(SizeAppLauncher.class, args); } @Override public void start(Stage stage) throws Exception { try { final Parent root = FXMLLoader.load(getClass().getClassLoader() .getResource("lankydan/tutorials/fxml/SizeApp.fxml")); final Scene scene = new Scene(root); stage.setScene(scene); stage.setTitle("Size Example"); stage.minWidthProperty().bind(scene.heightProperty().multiply(1.5)); stage.minHeightProperty().bind(scene.widthProperty().divide(1.5)); stage.show(); } catch (Exception e) { System.out.print(e); } } } |
控制舞台最小/最大尺寸的行已删除,因为用于保持纵横比的代码将覆盖其功能。 您可以自己尝试一下,然后放回去,增大/减小窗口大小,然后看它不会妨碍您执行此操作。
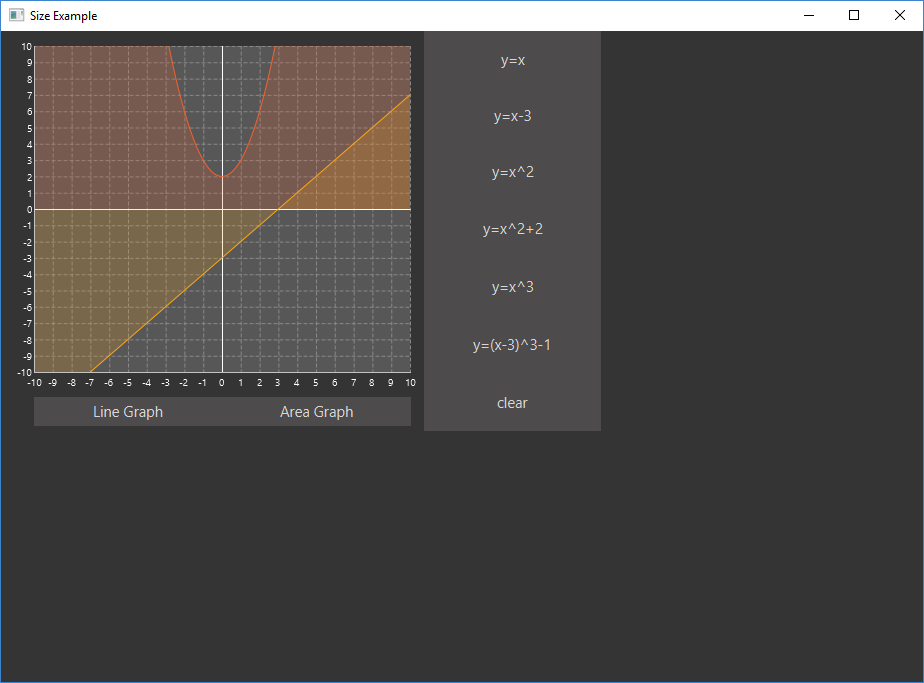
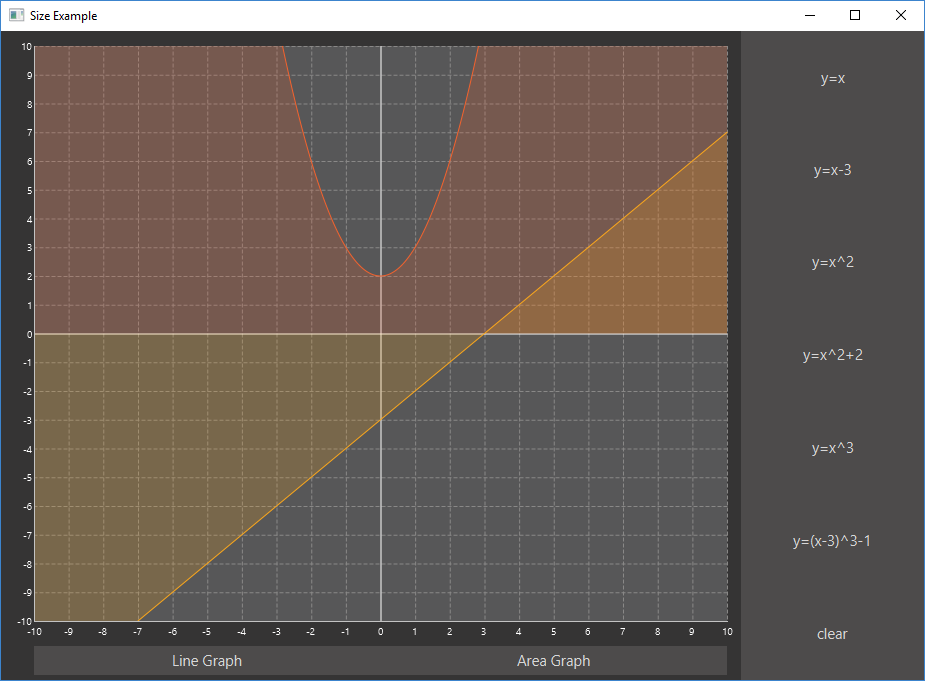
控制窗口的大小就足够了,您将需要知道如何在其中设置组件,否则它们可能会发疯或消失在窗口边缘。 我们将需要使用一些可调整大小的组件来做到这一点,例如AnchorPane,Hbox和VBox,并使用一些锚点来控制它们。
1 2 3 4 5 6 7 8 9 10 11 12 13 14 15 16 17 18 19 20 21 22 23 24 25 26 27 28 29 30 31 32 33 34 35 36 37 38 39 40 41 42 43 44 45 46 47 48 49 50 51 52 53 54 55 56 57 58 59 60 61 62 | <?xml version="1.0" encoding="UTF-8"?> <?import javafx.scene.Cursor?> <?import javafx.scene.chart.AreaChart?> <?import javafx.scene.chart.LineChart?> <?import javafx.scene.chart.NumberAxis?> <?import javafx.scene.control.Button?> <?import javafx.scene.layout.AnchorPane?> <?import javafx.scene.layout.HBox?> <?import javafx.scene.layout.VBox?> <AnchorPane maxHeight="400.0" maxWidth="600.0" minHeight="400.0" minWidth="600.0" prefHeight="400.0" prefWidth="600.0" styleClass="root" stylesheets="lankydan/tutorials/fxml/css.css" xmlns="http://javafx.com/javafx/8.0.111" xmlns:fx="http://javafx.com/fxml/1" fx:controller="lankydan.tutorials.fxml.controller.MainAppController"> <children> <HBox prefHeight="400.0" prefWidth="600.0" AnchorPane.bottomAnchor="0.0" AnchorPane.leftAnchor="0.0" AnchorPane.rightAnchor="0.0" AnchorPane.topAnchor="0.0"> <children> <AnchorPane prefHeight="400.0" prefWidth="420.0" HBox.hgrow="ALWAYS"> <children> <LineChart fx:id="lineGraph" createSymbols="false" legendVisible="false" prefWidth="423.0" visible="false" AnchorPane.bottomAnchor="28.0" AnchorPane.leftAnchor="0.0" AnchorPane.rightAnchor="0.0" AnchorPane.topAnchor="0.0"> <xAxis> <NumberAxis autoRanging="false" lowerBound="-10" side="BOTTOM" tickUnit="1" upperBound="10" /> </xAxis> <yAxis> <NumberAxis autoRanging="false" lowerBound="-10" side="LEFT" tickUnit="1" upperBound="10" /> </yAxis> <cursor> <Cursor fx:constant="CROSSHAIR" /> </cursor> </LineChart> <AreaChart fx:id="areaGraph" createSymbols="false" legendVisible="false" prefHeight="372.0" prefWidth="423.0" AnchorPane.bottomAnchor="28.0" AnchorPane.leftAnchor="0.0" AnchorPane.rightAnchor="0.0" AnchorPane.topAnchor="0.0"> <xAxis> <NumberAxis autoRanging="false" lowerBound="-10" side="BOTTOM" tickUnit="1" upperBound="10" /> </xAxis> <yAxis> <NumberAxis autoRanging="false" lowerBound="-10" side="LEFT" tickUnit="1" upperBound="10" /> </yAxis> <cursor> <Cursor fx:constant="CROSSHAIR" /> </cursor> </AreaChart> <HBox layoutX="33.0" layoutY="366.0" prefHeight="29.0" prefWidth="377.0" AnchorPane.bottomAnchor="5.0" AnchorPane.leftAnchor="33.0" AnchorPane.rightAnchor="13.0"> <children> <Button fx:id="lineGraphButton" maxWidth="Infinity" mnemonicParsing="false" onAction="#handleLineGraphButtonAction" prefHeight="29.0" prefWidth="183.0" text="Line Graph" HBox.hgrow="ALWAYS" /> <Button maxWidth="Infinity" mnemonicParsing="false" onAction="#handleAreaGraphButtonAction" prefHeight="29.0" prefWidth="184.0" text="Area Graph" HBox.hgrow="ALWAYS" /> </children> </HBox> </children> </AnchorPane> <VBox prefHeight="398.0" prefWidth="183.0" HBox.hgrow="NEVER"> <children> <Button maxHeight="Infinity" mnemonicParsing="false" onAction="#handleXYButtonAction" prefHeight="66.0" prefWidth="266.0" text="y=x" VBox.vgrow="ALWAYS" fx:id="xyButton" /> <Button maxHeight="Infinity" mnemonicParsing="false" onAction="#handleXYButton2Action" prefHeight="66.0" prefWidth="266.0" text="y=x-3" VBox.vgrow="ALWAYS" fx:id="xyButton2" /> <Button fx:id="squaredButton" maxHeight="Infinity" mnemonicParsing="false" onAction="#handleSquaredButtonAction" prefHeight="67.0" prefWidth="266.0" text="y=x^2" VBox.vgrow="ALWAYS" /> <Button fx:id="squaredButton2" maxHeight="Infinity" mnemonicParsing="false" onAction="#handleSquaredButton2Action" prefHeight="67.0" prefWidth="266.0" text="y=x^2+2" VBox.vgrow="ALWAYS" /> <Button fx:id="cubedButton" maxHeight="Infinity" mnemonicParsing="false" onAction="#handleCubedButtonAction" prefHeight="67.0" prefWidth="266.0" text="y=x^3" VBox.vgrow="ALWAYS" /> <Button fx:id="cubedButton2" maxHeight="Infinity" mnemonicParsing="false" onAction="#handleCubedButton2Action" prefHeight="67.0" prefWidth="266.0" text="y=(x-3)^3-1" VBox.vgrow="ALWAYS" /> <Button fx:id="clearButton" maxHeight="Infinity" mnemonicParsing="false" onAction="#handleClearButtonAction" prefHeight="67.0" prefWidth="266.0" text="clear" VBox.vgrow="ALWAYS" /> </children> </VBox> </children> </HBox> </children> </AnchorPane> |
我知道要接受的代码很多,所以我将为您分解代码。
这段代码是从HBox标签之一中提取的,并将其锚定到HBox父级的AnchorPane的每一侧。" 0.0"表示将其锚定到父级的边缘,因此,如果将其设置为" 5.0",则将从每个边缘锚定5个单位。
为了使这一点更清楚:
这意味着HBox的底部从AnchorPane的底部边缘锚定为5个单位。
这意味着HBox的左侧从父AnchorPane的左边缘的左侧锚定为100个单位。
还有更多属性供您选择。
当HBox更改大小时,使用它可以使HBox内部的组件水平增长。 如果您不希望更改,请使用…
VBox内部的组件也可以使用非常相似的属性,但是它们不会水平变化,而是会垂直增长或收缩。
上面的示例使用ALWAYS和NEVER,但您也可以使用值INHERIT和SOMETIMES。 它们似乎很简单,INHERIT将继承其父级的属性,并且只要没有子级标记为ALWAYS,则在具有SOMETIMES选项的子级之间增大大小时,SOMETIMES选项将共享空间。
在此示例中,最后要注意的是按钮的最大高度或宽度。
如果在Button标记内没有这些属性,则即使每个Button都定义了vgrow或hgrow属性,它们也将无法适应其Hbox或Vbox父级。
将所有这些加在一起将使您拥有一个更好的应用程序。

这是本小教程的结尾。 如您所见,大小确实很重要。 所以去告诉所有朋友,只记得告诉他们您在谈论JavaFX,否则他们可能会得到错误的印象!
如果您只是想插拔电源,这里是所有代码的链接。